I went to an ice dying workshop for the Clark County Quilters recently. It was my second time taking the class taught by Ann Robertson, who is an expert on fabric dying. She is so knowledgeable with years of experience in dying fabric. This time, she showed us some different techniques, like dying at an angle inside of a piece of gutter, folding and crimping, using rubber bands and waxed twine. Her samples were jaw dropping!
Since I had done a little ice dying, I thought that I would try new things. I started with 4 pieces of white fabric at home and put them into a vat of turquoise dye. They soaked for about 2 hours before they hit the ice dying process. The other 4 pieces of fabric were prepared and dried by Ann, so they were all ready to into the ice dying containers.
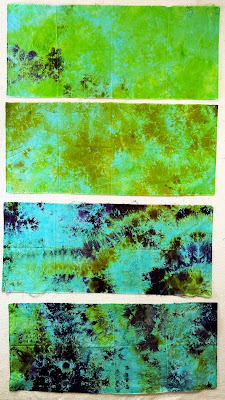
For the turquoise fabric, I squeezed out the excess dye, scrunched the fabric into the baskets, then added ice on top. I added dye powder in lime pop, chartreuse, gunmetal, and imperial purple in various combinations. Then I sprinkled a bit more soda ash on top, and added another layer of ice on top of that. Ann let us know that they soda ash soak normally used is 1 c. soda ash to 1 gallon of water. for ice dying, she uses 2 c. soda ash to 1 gallon of water. That's why she suggested sprinkling more soda ash on top of the immersion dyed fabric. Here are the results of those 4 pieces.
With the white pieces, I put marbles in one and secured them with rubber bands. In another one I twisted a few spots and secured those with rubber bands. On another one, I twisted in a couple of spots, and tied it in two places with waxed twine. The final one was scrunched. I added the same dye powders as above, and also Cerulean blue. Frankly, I can't tell you which piece is what, but here are the results.
I really like how they turned out.


No comments:
Post a Comment