Showing posts with label Aquamesh. Show all posts

Friday, November 29, 2024

Garden Lady #10 - Part One - Winter Interest

Nearly everyone that I asked told me to make a winter scene for the final Garden Lady in the series.  She is going to be #10 and I'm going to name it "Winter Interest".

I found a digitally generated design that I liked on Pinterest.  I tried very hard to find the artist who was the source of this pin, but couldn't find it.  Dang it.  I really want to give credit to the originators of my ideas. It was pinned by Anouklaga, who has pinned many artists on her pages.  It is a very sweet and fitting end to my series of Garden Ladies.  It'll be a challenge to make so many wings!


I traced it and had it enlarged at my favorite blue print shop in Portland.  For this piece, I decided that I would definitely start with the wings.  I like wings to be transparent and so organza was the obvious choice for the fabric.  I made wings for my second Garden Lady the same way, which was to layer 2 pieces of organza between dissolvable stabilizer, draw on the veins, stitch it around the edges and along the veins, soak it in water, and press it into shape.  I found a couple of sheer fabrics at JoAnn's and decided to layer 2 different ones on the wings.  Here are the 2 fabrics, which I know are hard to see in the photos.  One is iridescent shimmering, and I put that one on the top.


I traced the wings onto freezer paper to make the pattern.


This was laid down on my cutting table.  


The next layer was Aquamesh, a product from AES.  


Then the two layers of sheer fabric.  And finally, the top layer of Solvay.  I traced the pattern onto the Solvay with a permanent ultra thin marker (this gets washed away!).


I pinned it all in place then removed the freezer paper pattern from the back.  I used gold metallic thread in the top and the bobbin of my machine and zig-zagged on top of all of the drawn lines.  


The next step was to cut around the outside of all of the wings, leaving a scant 1/4" from the stitching.


It got soaked for a few minutes to dissolve the top and bottom products, then laid out to dry, ironed, and placed on the design wall on top of the pattern.


 I hope you like it so far!


Monday, September 23, 2024

Garden Lady #8 - part Five

This is a continuation of 4 previous posts about the making of Garden Lady #8.  I started making all of the leaves with a ton of different fabric and thread.  I like the look of transparent leaves, shiny leaves, mottled leaves, and tons of fall color.  This was so much fun, I almost forgot to take pictures.  My experience with making leaves is that two layers of fabric sandwiched between dissolving products works the best.  When they are all done being sewn and rinsed, they retain a little bit of stiffness that allows me to manipulate the leaves when I'm adding them to the quilt.  I knew that I needed to design the fascinator on her head too, so you'll see some "gems"  that I could put on top of the hat the same way.

Years ago, I picked up a bunch of fall leaves and pressed them into my sketch book.  I used these leaves for the patterns for the leaves of this quilt.  They're drawn onto freezer paper with a permanent marker because the darker line helps to trace the lines later in the process.


I used 2 different dissolving products to make the leaves.  One product was clear Solvay.  The other was Aqua Mesh, which is a white mesh, but also somewhat see-through.  I like both products - one that is more stable, and one that is see through for placement.  So in the following pictures, you'll notice the two different products.   I layer the dissolving foundation on top and bottom and sandwich the two layers of fabric between them.  Then I trace the leaves by slipping them just underneath the top layer.  I try to place them close together so that I use most of the fabric.  I mark this also with the permanent marker - but don't worry!  The marker is on the piece that dissolves and it goes down the sink with the rest of it!.  


I used several different fabrics and different metallic and/or rayon thread.  


Using a tight zig-zag stitch of 1.8 to 2.0 mm width and 0.40 to 0.45 mm width, I stitched around the outside edge and on top of all of the veins and stem.


Then, I cut out the leaves with a small amount of seam allowance on the edges.


These got soaked in water until the product disappeared.  It happens pretty fast with Aqua Mesh and takes a little longer with Solvay.  I feel like the Solvay also leaves a bit of residue which stiffens the leaves a tad.  After they're soaked and blotted with a towel, I laid them on a sheet of non-stick Teflon.  (These sheets are sometimes called applique sheets.)  


One last thing that you'll notice in the picture above are the transparent leaves.  I made a base "fabric" with threads that were sandwiched between dissolving foundation and quilted.  Before I rinsed that out, I followed the same steps for transferring and sewing the leaves. 
 

Some of it fell apart, but most of it stayed together and I laid them out along with the other leaves to dry.

I hope you like my process for making leaves!


Monday, March 11, 2024

Garden Lady #6 - Part Four

This is a continuation of 3 previous posts about the making of Garden Lady #6.  After I appliqued the lady and the bird, I quilted the background and the lady.  The background fabric was so busy that I chose to quilt it with light gray thread in a horizontal wave style.

I made the nest with layers of yarn and thread sandwiched between 2 layers of Solvay, stitching through them, and soaking away the Solvay.  This picture shows the sketch and the completed nest.


The birdcage was made by layering Aquamesh, an off-white organza, the nest, and the top layer of Solvay.  I traced the bird cage pattern in permanent marker on the Solvay, then stitched through the layers with thread.  After that was completed, I couched down a layer of black perle cotton with a thick zig-zag stitch set at 2.5 width and 0.40 length.  


The bottom of the bird cage was several layers of zig zag stitching with the black perle cotton couched down.  The stitch width was widened to 4.0 and several passes were made to really thicken it up.  Here it is before soaking:


And after soaking:


I hope you like it so far.

Monday, March 4, 2024

Garden Lady #6 - Part Three

This is a continuation of two previous posts about the making of Garden Lady #6.

I made the apron over skirt out of lime green organza and red thread.  The layers that I used to make it were Aquamesh (dissolving product for stability) on the bottom, the organza, Solvay (dissolving clear product to use as a pattern and to keep the thread from sinking into the organza) on top with the pattern written in permanent marker.   I set the zig zag stitch for a tight stitch (.40 length and 3.0 width) and stitched over the lines twice for the top apron and once for the bottom apron.


After rinsing out the product, drying and ironing it, I pinned it in place.


While I didn't want to add tons of floral details on this quilt, it was obviously too plain the way it was.  So, I sketched up a birdcage with a nest, a pot of tulips, and some muscari for a spring feel.  Here were my ideas.


I didn't like the look of the original birdcage that I drew, so I sketched up a second one and will use that for this quilt.  


I think that this was enough and I went forward with these ideas.

I hope you still like where this art quilt is heading.


Monday, May 1, 2023

Green Butterfly Lady - Part One

After making the Northwest Garden Lady art quilt, I decided to make 2 more green lady art quilts.  I LOVE LIME GREEN!  If you've been reading my blog, you already know this about me.  I have green doo-dads all over my studio, and frankly, all over the house.  I collect green depression glass, have a lime green stand mixer, lime green dishes, lime green clothes, lime green front door, lime green patio furniture, plus a lot of other stuff.  I just bought a lime green rain coat from Pendleton!  I am just so happy and delighted when I surround myself with lime green.

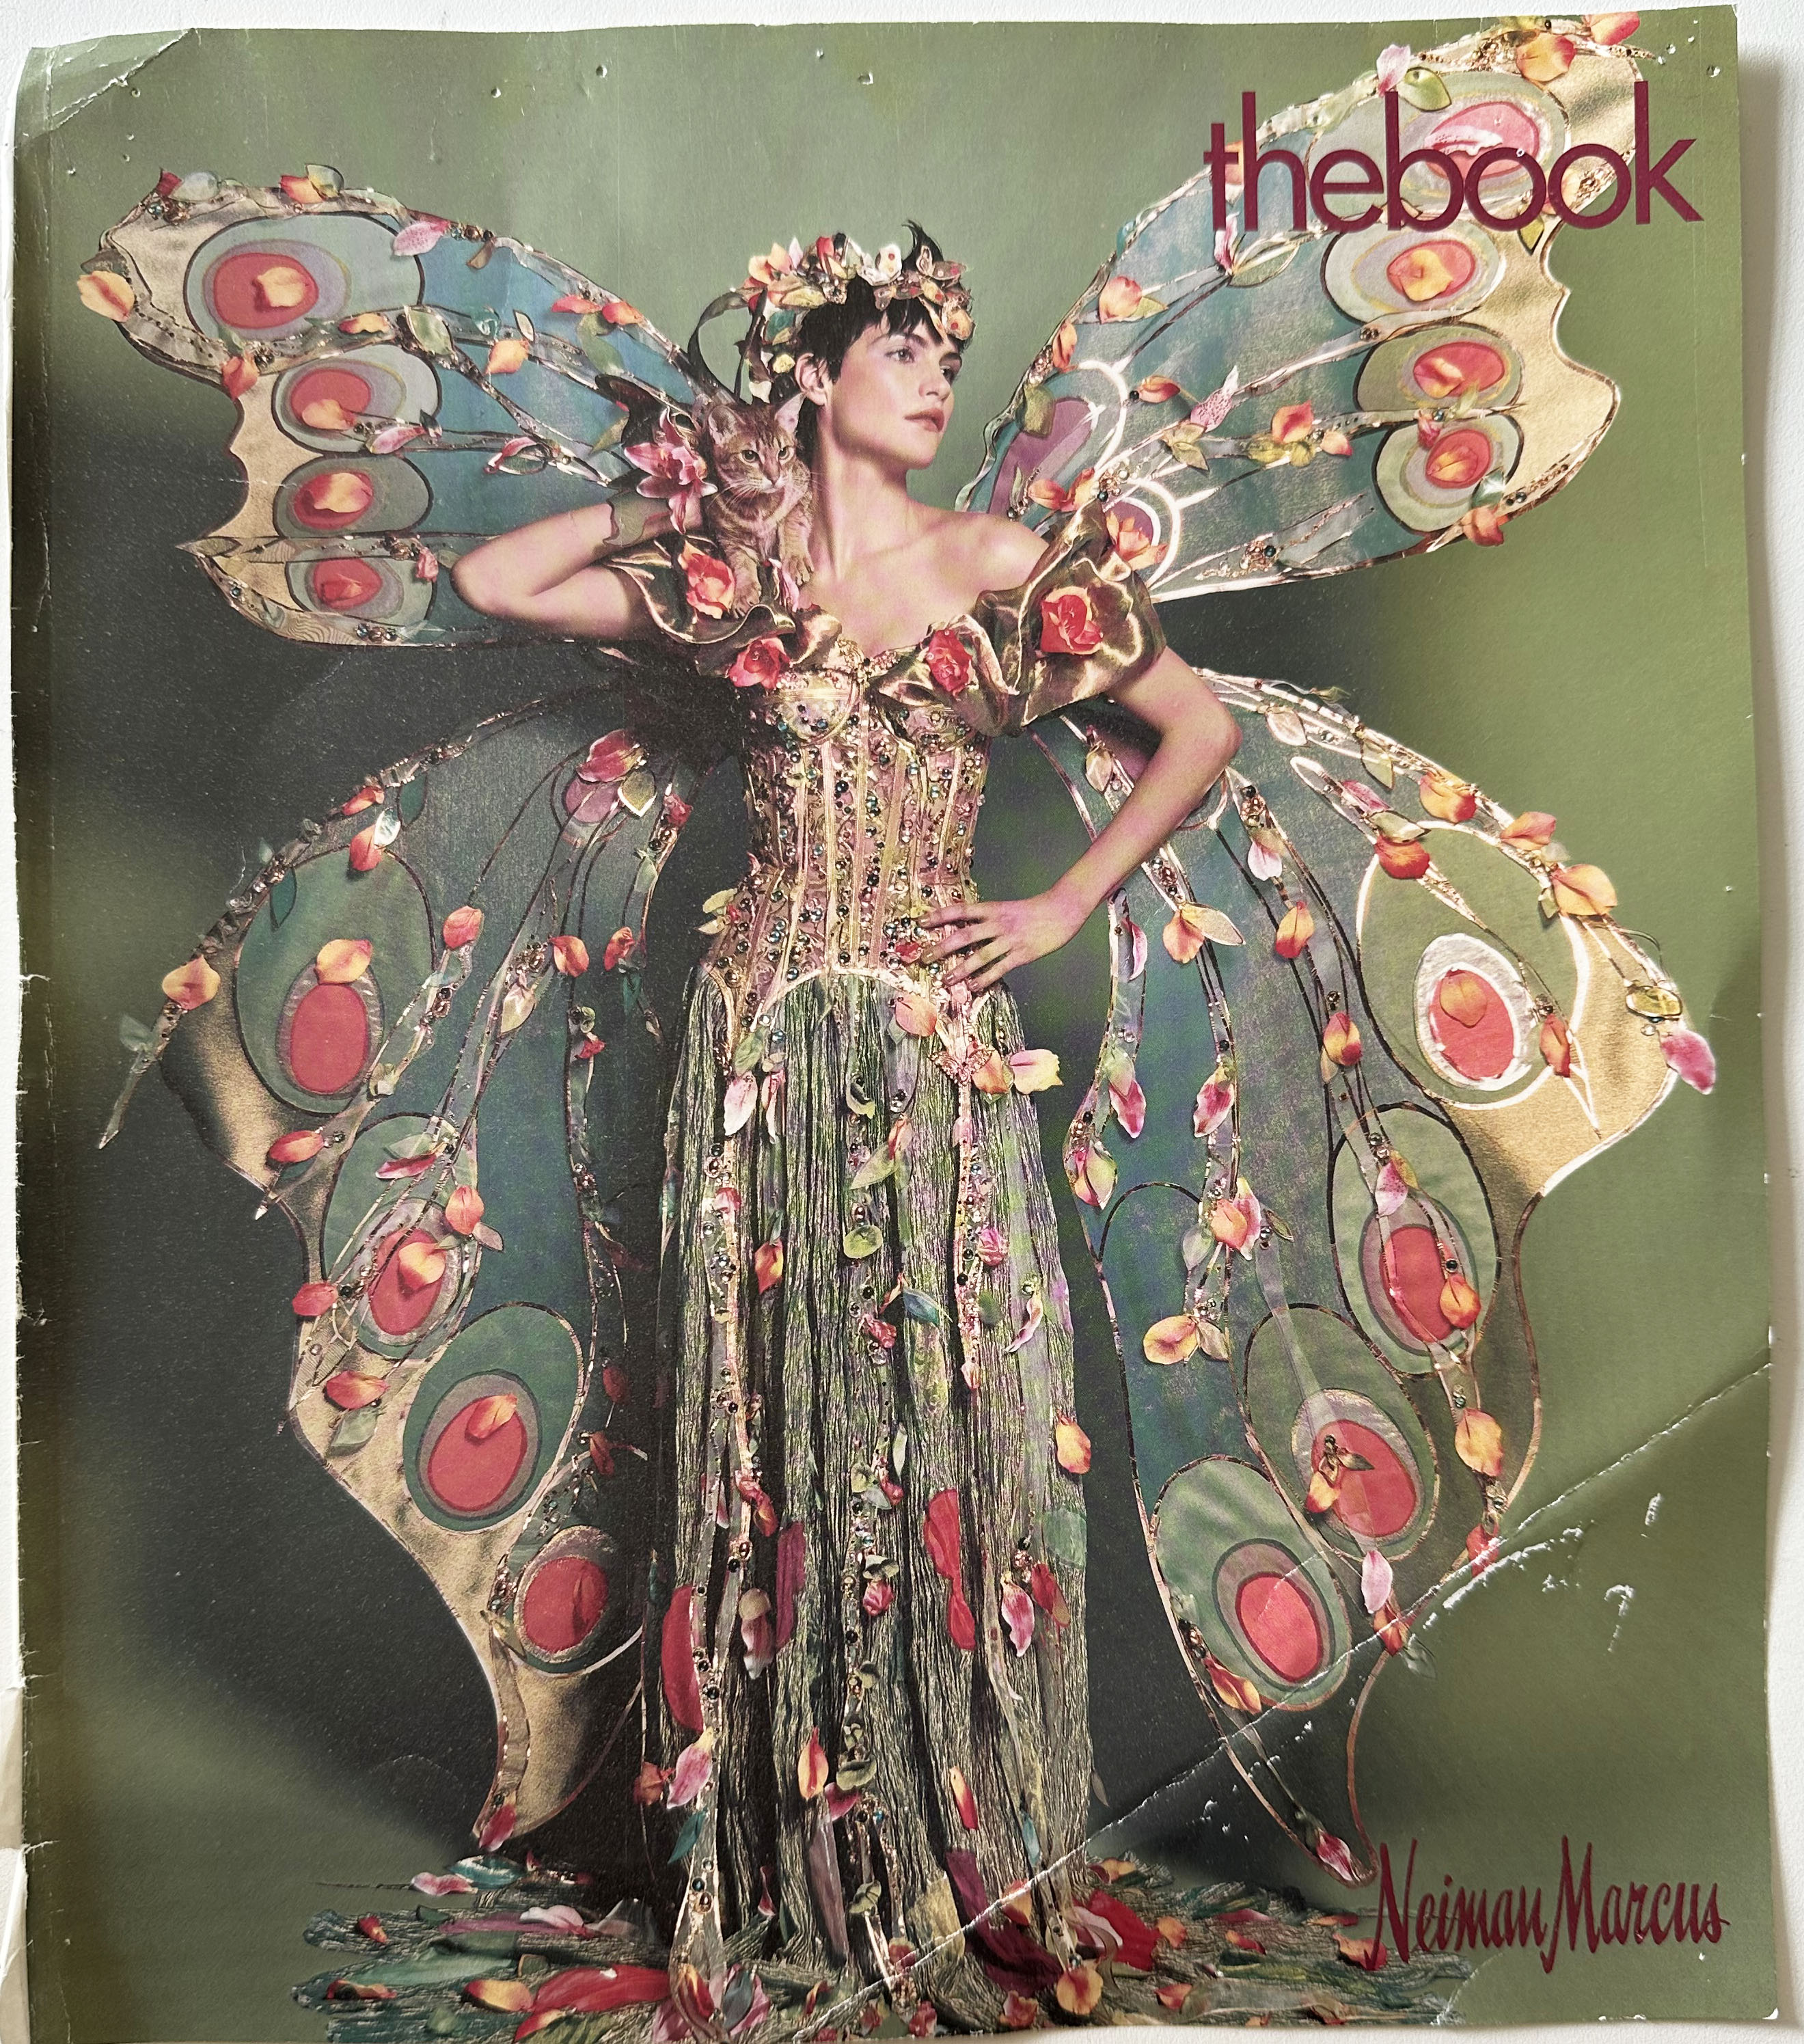
Neiman Marcus put a green butterfly lady on the front cover of "The Book" in May 2003.  I saved it and have had it on my bulletin board ever since.  20 years later and I still love the picture!  This was the inspiration for my second green lady.  


I traced it and had it enlarged to be the same height as my other green lady.  When I traced it, I noticed that there was a cat sitting on the lady's shoulder.  I had never seen it before; or I hadn't remembered seeing it.  I'm going to imagine that it isn't there for my quilt and perhaps fill in the space with flowers.

I started by concentrating on the wings first.  Since I wanted them to be transparent, I pulled out all of the organza in my stash.  I had lots of colors that would work, but needed a large piece for the background of the wings.  So, I headed over to JoAnn Fabrics and found much more than I thought I needed in both organza and ribbons.  I found a luscious lime green organza, a sparkly white net, a sparkly pink organza and a peach floral sheer.  Then I picked up some ribbon in several shades of pink , a couple in bronze and finally some fake flowers.  


I backed some of the organza with Misty Fuse and then cut it into shapes for the eyes and embellishments on the wings.  This step was done first, using freezer paper templates.


I already had all kinds of stabilizers and decided on two for the wings.  For the bottom layer, I placed OESD Wash Away AquaMesh.  It has enough body to support the organza and stitching, but washes away to leave only the light transparent layers.  The top stabilizer was clear Solvy.  I could trace the design on this top layer, stitch the piece, and wash off the stabilizer and marker.


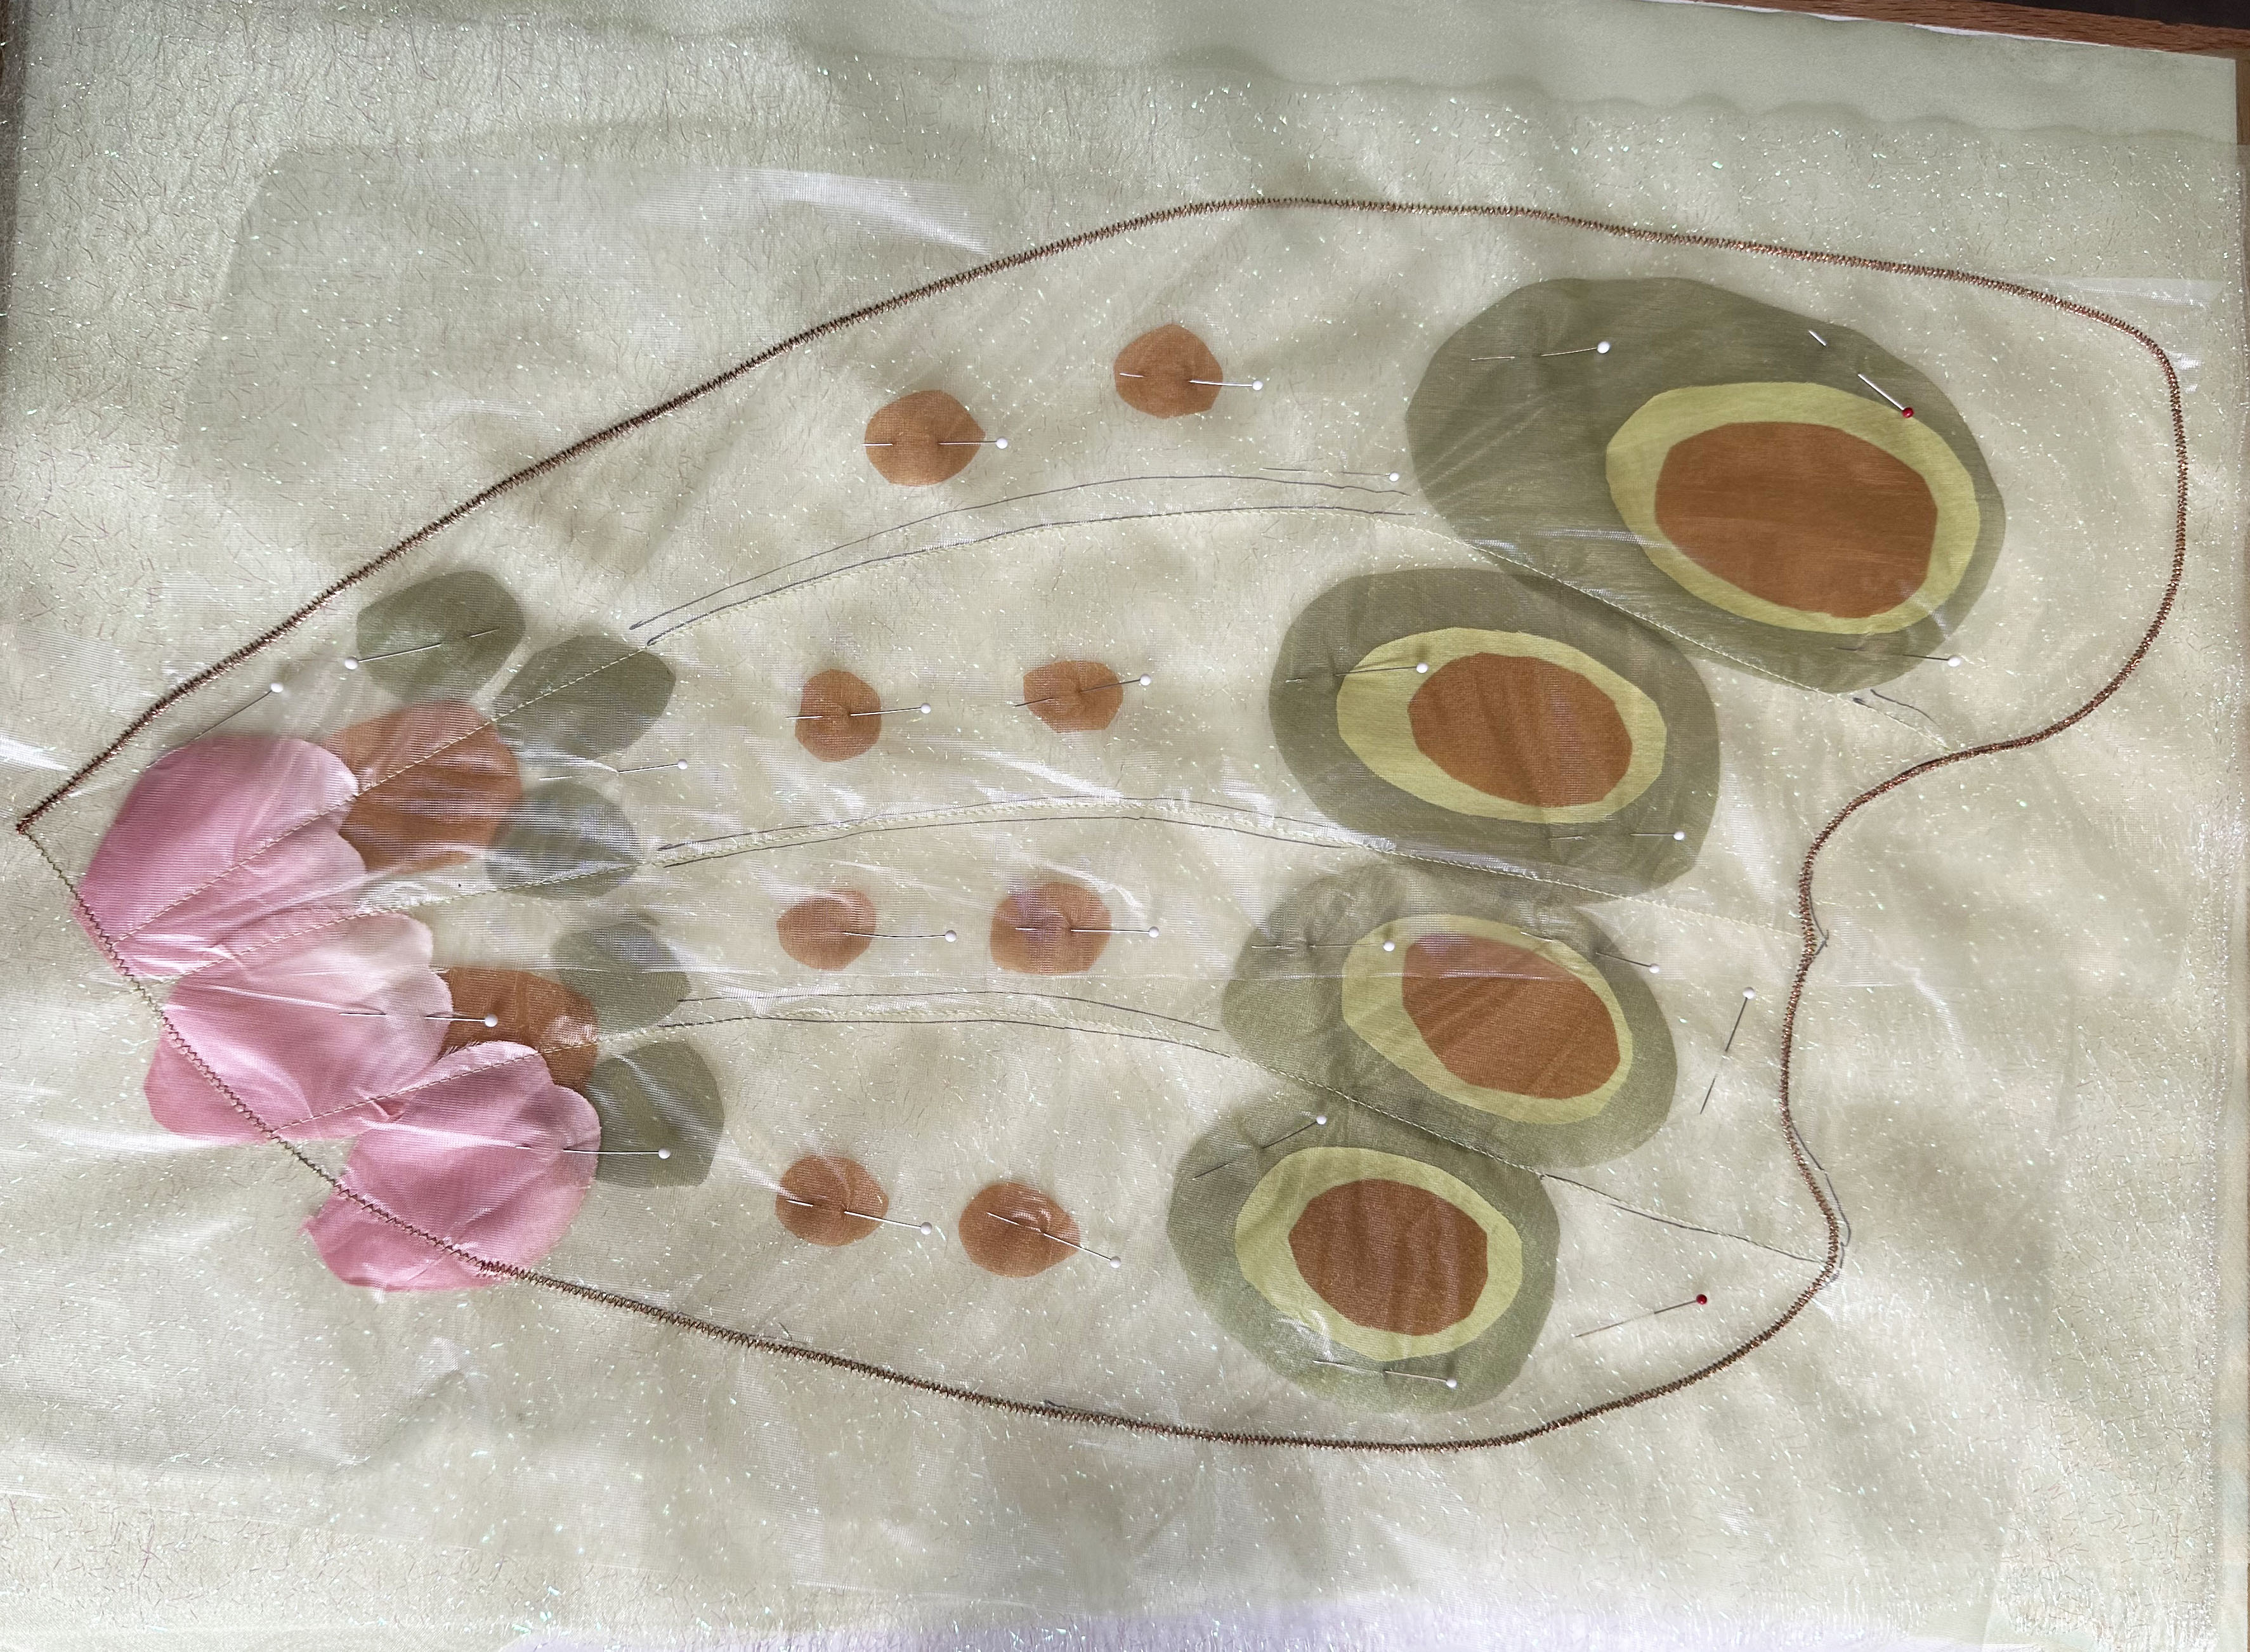
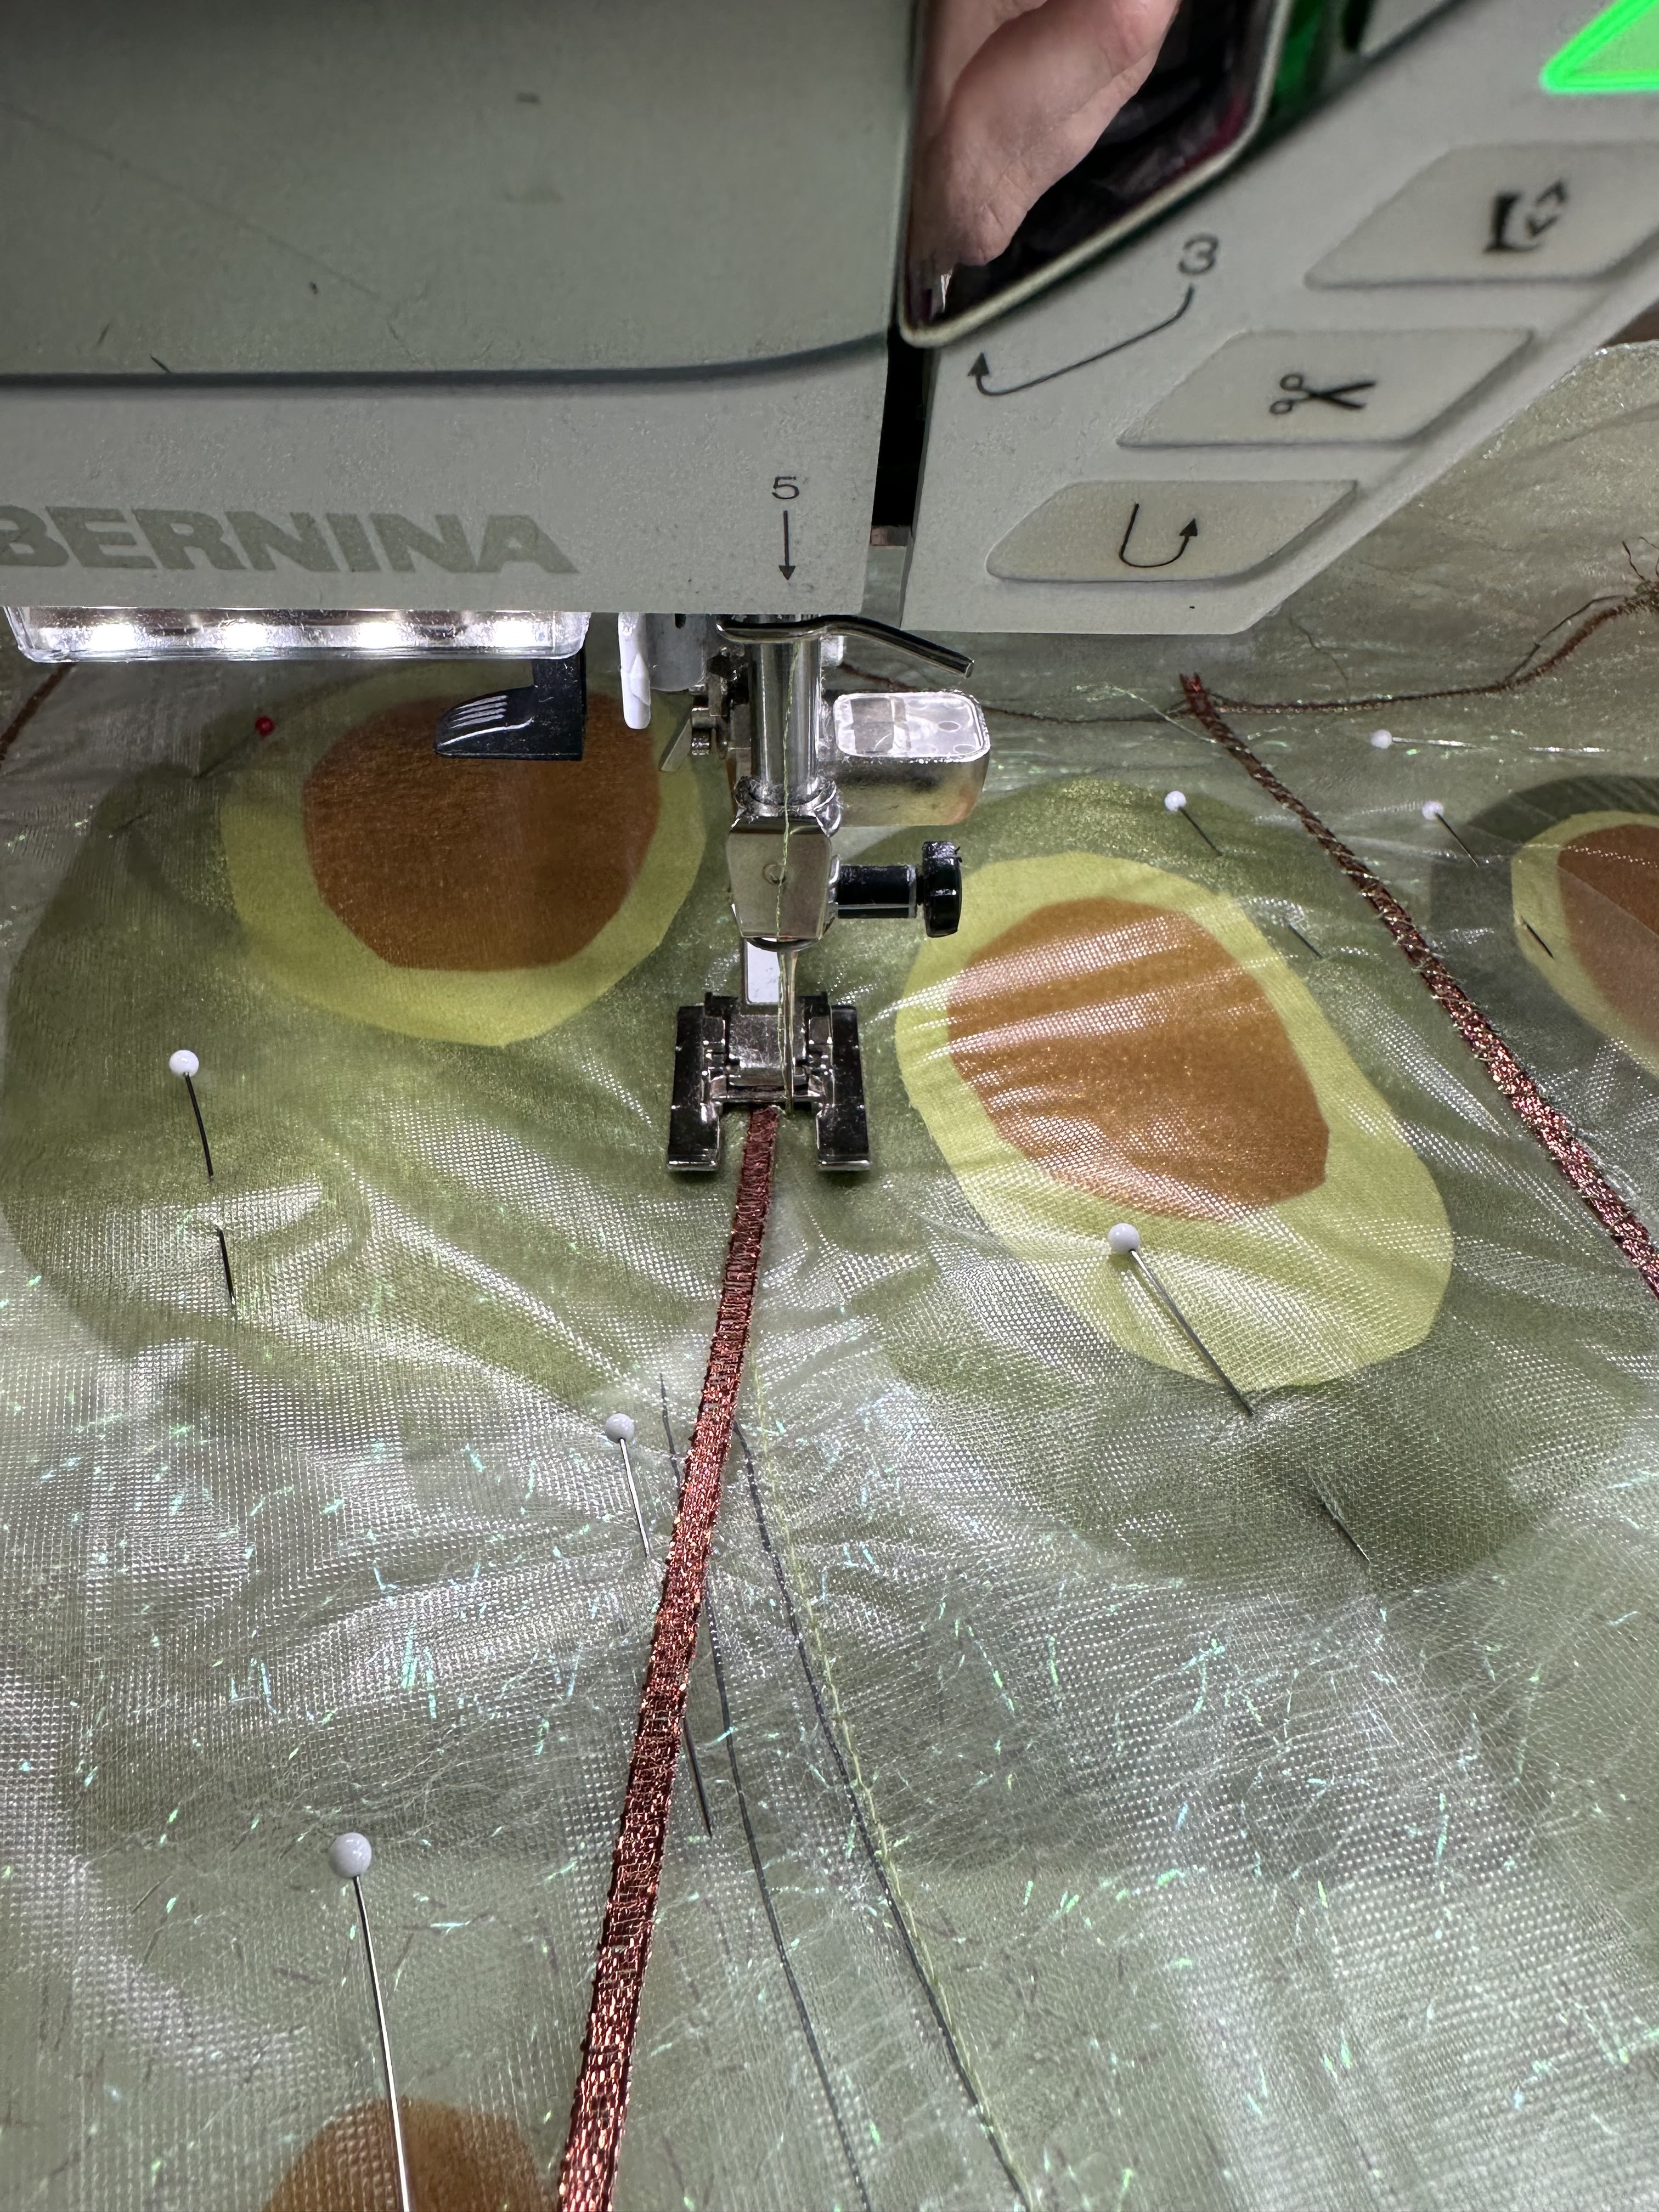
Here is the order of the layers:   AquaMesh; green organza, sparkly white net, eyes and embellishments backed with Misty fFse, and Solvy.  The sandwich was pinned together and stitched down with regular green thread on the outer edges and the lines between the wings.   I used one of the ribbons for the pieces between the ribs of the wings using a 4.5 W x 2.7 L stitch setting.  Zig Zag stitching was done as 2.0 W x 1.0 L for the veins in green sparkly thread, and 3.6 W x .65 L for the outer edges in bronze sparkly thread.  


When all the stitching was done, I trimmed the outer edges, leaving a little extra, then soaked and dried the pieces.  Here is one of the upper wings:


I hope you like it so far!