Monday, December 26, 2022

Northwest Garden Lady - Part One

This fabric art piece was inspired by a picture that I saw on a social media site.  I loved that the garden lady was obscured by her hat of flowers and holding a glass of wine.  As in previous art quilts, I traced the design and had it blown up to size for my working pattern.


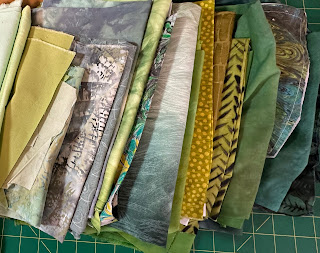
It took a while to decide how I was going to make the dress.  Since I have done collaged pieces before, I thought that the technique might work.  I started with a base of batik that had leaves on it, and cut blobs of fabric out of several shades of green.  I had some leftover leaves made from organza that I tossed in, along with yarn, rick-rack, thread, antique trims, wool roving, and Angelina fibers.  Here is the pile of fabric and enhancements that I used.


I layered the blobs onto the background, which was lightly sprayed with temporary basting spray.  Where the blobs overlapped, I ran a glue stick under the edges.


 Next, I cut and placed the pieces of all the other stuff to give me a nice shading from the front of the dress towards the back.  All of that was covered with green tulle.  I picked out shades of green thread for the quilting, and after backing it with a stabilizer, I quilted the entire dress.  


After it was quilted, I placed the pattern on top, cut out 1/2" seam allowance and turned the edges under with a glue stick.  Here is the dress placed on top of the pattern.   I really like how it turned out!


Stay tuned for more progress on this piece.  

Monday, December 5, 2022

Sunrise quilt

I had a lot of leftover yellow fabric from a previous quilt and a ton of hand dyed orange and purple pieces that I wanted to put into a quilt.  I saw a picture of one that was made from scraps in orange, yellow, gray, and white.  It was on my design board for a few months, and it really spoke to me.  So it became the inspiration for this one.

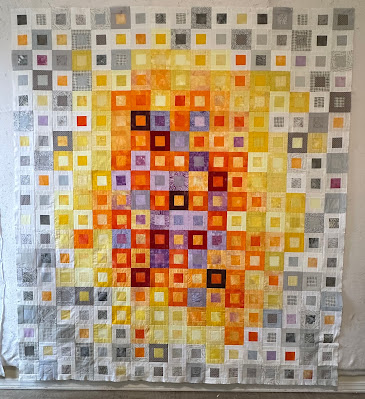
I decided to make all the square-in-a-square blocks 4" finished.  I cut a bunch of 2-1/2" squares, and a ton of 1-1/2" wide strips in most of the colors.  Then I piled them all into a bin and took them to the quilt retreat.  I made over 100 there, and sewed the rest of them at home.  I put the squares up on my design wall, and then made more to fill in where I decided the color needed to be.  As I made more, I moved them around a few more times.  When I liked the layout, I sewed them all together.  Here is what the top looked like before quilting.


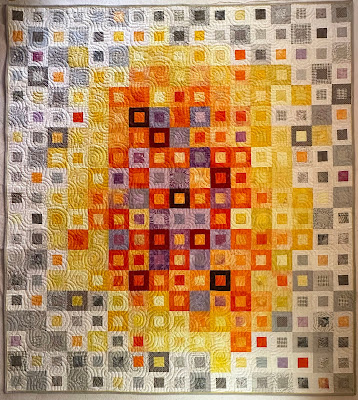
I took it to Tami Levin and she used a digital edge-to-edge design called Deep Blue Sea.  

Here it is all quilted and bound.  There's a tiny yellow faux piping and a gray binding.   It's 69" W x 77" H.  I call it "Sunrise".  


I hope you like it!

Monday, November 14, 2022

Graduation quilt for granddaughter - Post #2

I was so disgusted with the progress on the quilt for my granddaughter that I took everything back off the design wall and took the blocks to my small quilt group for advice.  

Here's the comments I got from them:
   Ditch the bright green blocks
   Ditch the tissue box rectangles
   Ditch the striped pieces
   Keep working on it with the pale colors

Here's what I thought I needed to do:
  Ditch the large 16" squares and use them in a different quilt.  
  Use some ivory to brighten up the quilt.
  Try to make it more of a colorwash instead of jarring background colors.

After the input, I decided to try drafting it as an on-point quilt with the 3 large blocks down the center.  Here's my sketch:


And here's the progress 


It started to look half way decent; or I just started getting used to the pale colors.  Nope, it still wasn't doing anything, so off the wall it went again.  I added some blocks of beige and white stripe.  Here's the next attempt:


Still yucky!  So I put the stripes on point and got rid of all the dark blocks.  Here's the one that led to the final layout.


Stay tuned to see if this paler version made it to the end.

Monday, November 7, 2022

Graduation Quilt for granddaughter

One of my granddaughters is a junior in high school and is taking classes at the community college.  That means that its time to start thinking about and working on her high school graduation quilt.  I asked her mother what colors she likes now, and she said "Sage and beige".  Oh.  She used to like rainbow colors, nice and bright.  I'm not that keen on pastel quilts, but I decided I must slog through it.  

I picked out all the sage and beige fabrics in my stash, and surprisingly, I had some of both!  I definitely needed to go shopping for more beige, and maybe something more solid.  So off to the quilt stores I headed!   Here's the pile.


The pattern.  I auditioned several patterns that I thought were younger and more fun.  Most of them, though, depended on distinct value differences.  Sage and beige are too close to get that effect.  So, I decided to do an improv square in a square quilt.  Here is my sketch:


I made the large square in a square blocks and the long ones. 


Then I started doing improv to fill in the blanks.  I love doing improv piecing  For this quilt, most of the squares will end up 8".  Within that parameter, though, there is a lot of leeway as to how the blocks are constructed.  Some of them are colorways of 5 fabrics separated by a solid color.  Some have small squares within the square to alter the sizes.  And some are square within squares with the center piece different sizes and borders of different widths.  So much fun!  Showing some progress with these different blocks.


Well, I hated it.  It was just a jumble of crap.  It didn't look "young", or cohesive, or interesting.  Perhaps it was the winter blahs setting in or perhaps it was the colors that didn't appeal to me.  I pulled all the blocks off the wall and reorganized them.  Still, it was yucky.  

Stay tuned to see what I did.  


Monday, October 31, 2022

CLARK COUNTY QUILTERS - Quiltfest Northwest 2022

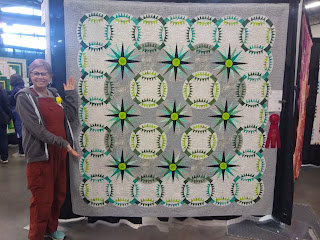
My local quilt guild, Clark County Quilters, held their annual Quiltfest Northwest at the end of October.  I helped with the set-up, selling tickets, and take-down.  Most of my friends entered multiple quilts, and I had 4 in the show this year.  There were over 400 quilts on display and it was a fabulous show.  I was so happy to be around people that share my passion, and to be able to meet so many new members.  I also saw so many friends that I hadn't seen in years.  I wish that I had taken pictures of all of them with their big smiles and my happy dance!

Here's 2 of my quilts, one of which sold to a local collector.  


I hope you either made it to this show or other quilt shows that are finally happening after the pandemic lockdown has eased.  


Monday, October 10, 2022

Quilt Retreat - FINALLY!

Our quilt guild finally had a quilt retreat in person.  I was so excited to go -- it's been too many years since I went with the guild.  Projects - oh yes, I had so many ideas.  But I narrowed it down to one for charity from a kit, and one using more of my hand dyed materials in oranges, yellows, gray and white.

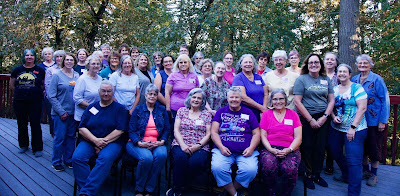
Here's the photo of the 35 retreaters.  So many new faces and old friends made for a wonderful time.  I'm in the back row, 3rd from the right.  

I finished the top for our charity group, made blocks for the retreat games, took some nice walks, ate a lot of snacks, made new friends, and made about 100 of the squares for the new quilt.  All in all, a great time!


Monday, October 3, 2022

Mod Squad Challenge - BEE MODERN

The Mod Squad Group of Vancouver, WA issued a challenge for the group.   Yellow, Black Background, 150" perimeter, only squares or rectangles.     I think we were allowed to add one more color.  

I definitely wanted to do something modern.  Several shades of yellow were used to make it more dynamic.  (And, that meant shopping for more yellow fabric!).  I liked using just one solid black.  

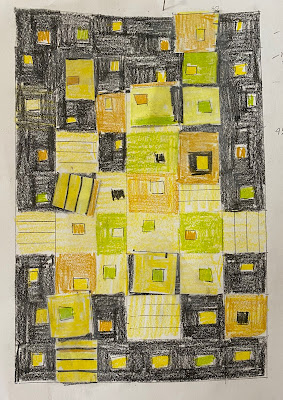
Here is my sketch:


Once I started sewing the pieces, I decided to add a few skinny strips of black around the colored centers, and skinny strips of yellow around the black centers.  I also made the centers slightly different sizes and made some offset from the center.  The blocks are all 5" finished, and there are 6 rows with 9 blocks long.  

I quilted it with black thread, alternating between 1/4" lines and 1/2" lines.  I also added circles here and there in the yellow sections to give it more personality.  It's 30" W x 45" H.  Here it is; its called 'BEE MODERN'


I hope you like it.  

Wednesday, September 28, 2022

2nd quilt from marbled fabric - Marbled Circles

After making an art quilt from the marbled fabric (and using only 3 small pieces), I decided to make one that included nearly all of the marbled fabric together in one quilt.  I remembered that I had made a quilt out of Hawaiian fabrics that showcased the material, but where the pieces didn't touch each other.  Since there was an overall theme to the fabric, I thought this might work with the marbled fabric too.

But, I recently bought a set of  Bloc loc  half rectangle rulers to make rectangular pieces and I wanted to give them a try.  


I cut my pieces 4" x 8" and followed the instructions that came with the rulers.  My final 3-1/2" x 6-1/2" pieces were perfect and the rulers were very easy to use.   The great thing was that most of the marbled fabric was in small pieces - less than a fat quarter - so this size made the most use of the fabrics.  Note:  there are great videos posted by the company on how to use the ruler.

I added blue, orange-red, and a 1930's green that matched the color of the inks used for the marbled fabric.  I sketched up this design:


And here is the quilt.  It's quilted with 2 sizes of circle rulers, all in green thread.  The final size is 43" W x 54" H. and I named it "Marbled Circles".


I hope you like it!

Monday, September 12, 2022

Postcards made with marbled fabric scraps

I had a little bit of leftover marbled fabric from the previous quilt and couldn't bring myself to toss it out.  So, I made a few little postcards.  I just collaged the fabric onto batting and  stiff interfacing (like Timtex), added a few pieces of metallic recycled trim and antique rick-rack, topped that with white tulle and quilted them.  Here they are:


I hope you like them1

Monday, September 5, 2022

First quilt from the marbled fabric - Northwest Marbled

This is the continuation of the post about making an art quilt from marbled fabric.

I used skinny black strips of fabric to lay out the design on my design wall.   Then I pieced the rows to fit within the black strips.  Initially, I wanted a skinny 1" black strip to separate the rows, but I found that it was impossible to make them fit and keep the colored stripes running vertical.  So, instead, I cut 2" strips, then fit the pieces together, narrowing the 2" piece where necessary to make them look right to me.  I added 4" borders on all sides, then quilted the piece in white and black thread.  After it was quilted, I trimmed it to size.  

It measures 46" W x 49" H.   The title of the quilt is "Northwest Marbled".  


I hope you like it!


Monday, August 22, 2022

Marbling Fabric

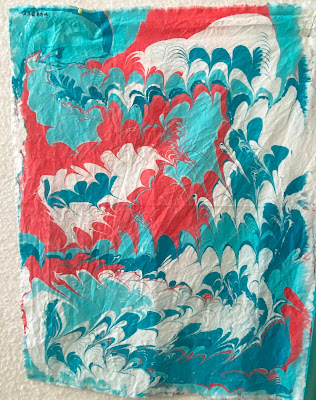
I took a class this summer on marbling fabric.  We made quite a bit of fabric, and I'm going to show you what I did with some of the pieces that matched.

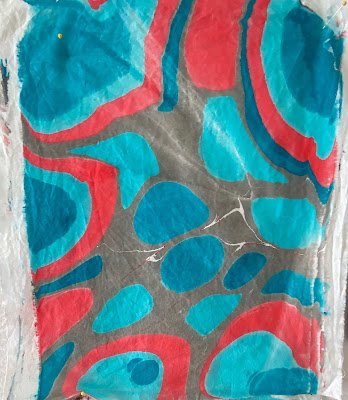
There were 3 fabrics made with turquoise, black, white and red.  The piece that had circles on it reminded me so much of Northwest Native Art that I decided to use those pieces first.  


I didn't want to just willy-nilly cut into the fabric, so I made copies of it on our home copy machine.  I cut the paper apart and started playing on my design board.  Here are some of the ideas and  progress photo for the art piece.


When I decided that it was what I wanted to make, I pulled out fabrics to give me a color progression and started cutting strips and piecing them together.  


Here is another progress photo, with some strips in place.


So far so good.


Monday, August 15, 2022

Striped fabric - 2 more charity quilts

As I was finishing up the charity quilts made with striped fabric, a member of my small quilt group came downstairs with more striped fabric that I could use.  I know that all of us experienced quilters have a huge stash of fabric.  At our ages (somewhere north of retirement age!), we know that we will never be able to use up all the material we have.   So, I took it and made 2 more striped quilts for our charity group.

For these two, I cut the squares on-grain, instead of on the bias, so that I could use as much of the fabric as possible.  Both of these had two striped fabrics in them, and I set them off with pinwheels again, which I just think it so adorable.  Anyway, here they are:


Thank you to Audrey Prothero!

I hope you like them.


Monday, August 1, 2022

More fabric dyeing

I can't remember if its dying or dyeing, with the 'e'.  At any rate, I've done more fabric dyeing and here are the results:

I had left over diluted dye from my previous combinations of fuchsia red, pagoda red, deep orange, deep yellow, amethyst, eggplant, and lemon yellow.  They were all diluted to 1/16th of the original strength in previous dye lots and saved in the refrigerator for about a month.  There were 4 bottles of the mixed colors that looked like 2 very similar shades of orange, a light dusty pink, and a light shade of purple.  This time, I scrunched the pre-treated and wet fabric into shoe box size containers and squirted the dyes on top of the fabric in several combinations.  I pushed the fabric into the liquid and let it sit overnight without stirring the fabric.  There are now 4 different fabrics to have fun with.


The other two pieces were ice dyed.  Each one of those pieces was pre-soaked and dried.  The dry fabric was scrunched into baskets, then covered thinly with ice cubes from our freezer.  I squirted the diluted red dye onto one and then added dye powder in two colors:  bronze and pagoda red.  I let that sit overnight.

In the second basket, I squirted the dilute purple on top of the ice, then added dye powder in two colors:  #150 gray, and midnight blue.


I just love how they all turned out so different and can't wait to use them in a quilt.


Monday, July 25, 2022

Striped fabric and 2 more charity quilts

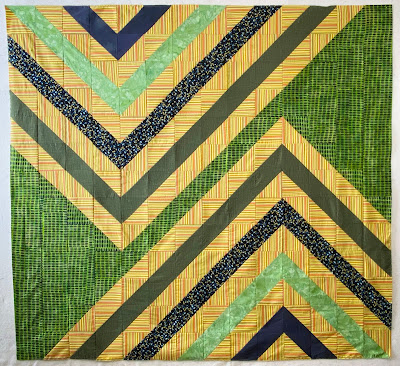
I got some more striped fabric from a friend in my small quilt group.  And I had some from the charity group stash as well.  So, I made two more striped quilts and added pinwheels in 2 sizes.  I like the modern look of these tops, and hope they find a nice home.


STRIPES AND PINWHEELS

55” x 66”

 Fabric

Striped material – need 72 each 6” squares cut on the bias – I started with 3 yards and cut all on the true bias

White – need 16 each 6-1/2” squares and 32 each 3-3/4 squares – 1 yard

Accent color – need 16 each 6-1/2 squares and 32 each 3-3/4” squares – used scraps to total 1 yard

 Sewing

Make half square triangles out of the white and accent color.

Trim the 6-1/2” ones to 6” square

Trim the 3-3/4” ones to 3-1/4” square

 Sew 4 of each size together to make a pinwheel.  You’ll end up with:

  8 of the large pinwheels (11-1/2” x 11-1/2”)

  16 of the small pinwheels (6” x 6”)

 Lay out the squares on a design board in a pleasing arrangement.  Orient the striped material to give a chevron effect.

Sew the columns together, then sew the rows together, pressing as you go.  You may have to sew in sections rather than in rows.  

Hint:  if you have more or less of the striped material, you can alter the number of the smaller pinwheels to make up the difference.  

Monday, July 18, 2022

Striped fabric - 2 charity quilts

I asked the charity quilt coordinator for some striped fabric and she sent me home with a small pile of them.  They seem to be the perfect fabric to make graphic charity quilts.

Here are two that I turned in recently, both with some hand dyed fabric and some commercial fabric.


Both quilt tops are 65" x 70", and I hope they find a nice home.

Monday, July 11, 2022

Mango Tango - Improv quilt

One of my friends taught a few of us how to make an improv quilt with wedgy stripes and free cut arcs.  It was fun day and a quick little quilt to put together.

I picked the hand dyed fabric that I've been making - orange, purple, and yellow in several shades.  Added to that was a recently purchased black and white print and a fun print that I picked up at the free table for our quilt guild.

After making several of the arc blocks, I trimmed them to 4" square and placed them on my design wall.  Then I put the striped sections next to them and started sewing them together in rows.  Each row had 2 of the arc blocks and 3 of the striped sections.  When they were all sewn together, I trimmed the edges all around.  The border is another hand dyed fabric with touches of eggplant and turquoise.  It was the perfect frame for the bright, vivid pieced section.  To complete the design, I slashed the borders and added narrow pieces of the striped pieces.  

It was quilted in purple thread in narrow straight rows and is faced.


The name "Mango Tango" was suggested.  I think I like it!


Monday, July 4, 2022

Ice Dyeing Fabric

I recently took a class through our local quilt guild that taught me how to ice dye fabric.  It was so much fun!  And not only because of what we learned, but also because it was in person and among friends.  Our teacher was extremely knowledgeable about dying fabric and her insights made it successful for everyone.

Here are the fabrics that I ended up with:

                            Eggplant


                        Gunmetal Gray
    
                    Peach and Bronze


Dyed in the "mud" at the bottom of the pan:


I hope you discover new and fun techniques too!